React Native Basic example - Digital Watch
Basic example - Digital Watch

Introduction
In this page we will review step by step how to create our first basic react native application using react native CLI in a Windows development environment and Android emulator to run our project.
We will see how to add some basic code to it and how to build & execute our app in android emulator.
The pre-requisites to be able to complete this basic app are:
- React native CLI installation
- Android Studio installation
- Android virtual device configured
Create a new project
There are different ways to create react native projects and different tools we can use to create them (Expo CLI / React Native CLI),
In this example we will use React Native CLI to create our project.
For more details about React Native CLI review the below documentation React Native
Navigate to the folder where we want to create a new project
We will use npx the package execution tool that ships with Node.js to run the react-native CLI using the init command to create a new React native project
The syntax to run commands with npx is as below:
npx <tool's_commands>
In our case the tool is react-native and the react native command we will use is init
npx react-native init
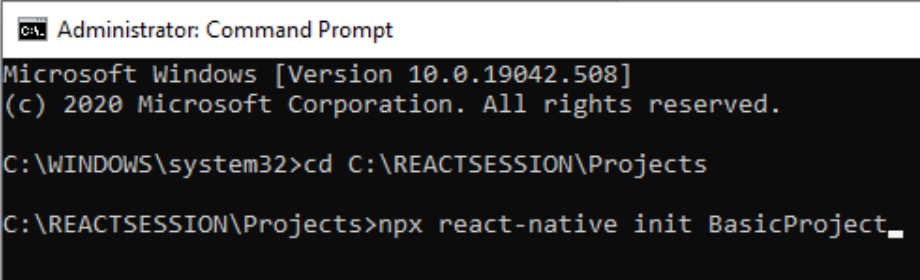
npx react-native init BasicProject
this will:
load modules and dependencies
fetch metadata
Extract modules
Download templates
Once completed will show instructions about how to run depending on device.
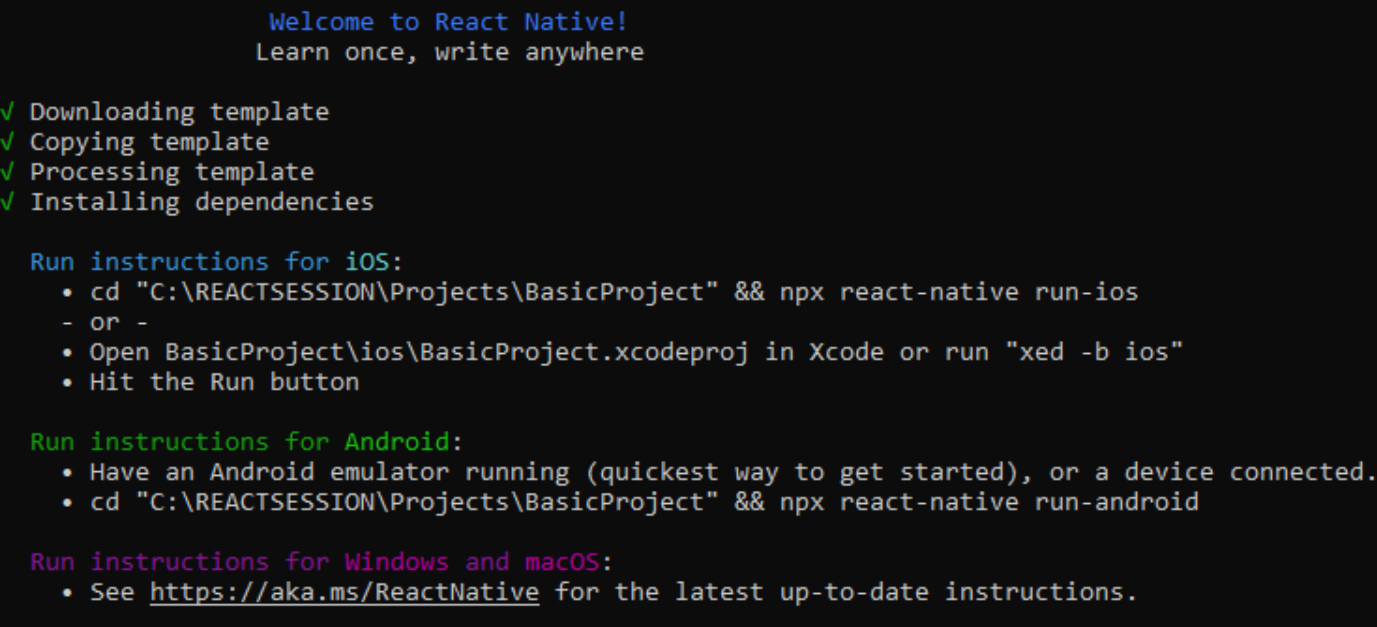
with this we have a JS based react native project created.
if we wast to work with TypeScript instead of JS we need to follow the steps here to convert our project to typeScript
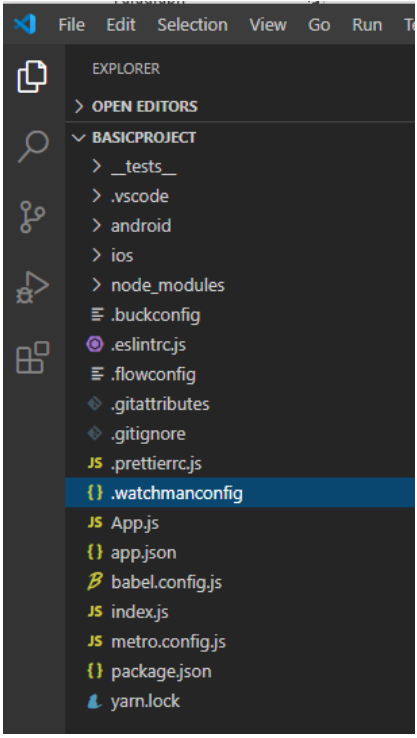
We can explore the content of the project folder created by react native CLI init command.
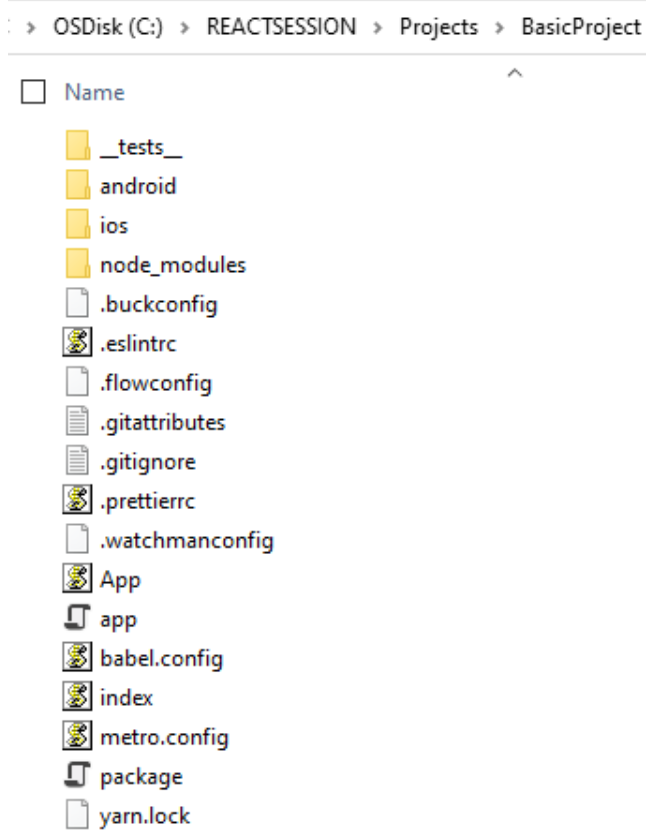
tests/
React Native's CLI includes Jest as a developer dependency and, to get testing started, it includes a folder named tests, in which all tests can be stored. By default, React Native's CLI adds one test file: index.js, representing the initial set of tests. Developers can add later tests for any components in the app. React Native also adds a test script in our package.json, so we can run npm run test from the very first moment.
Jest is ready to be used with every project initialized through the CLI and it's definitely the easiest option when it comes to testing React components, although it is also possible to use other libraries such as Jasmine or Mocha.
android/ and ios/
These two folders hold the built app for both platforms natively. This means that we can find our .xcodeproj and java files in here. Every time we need to make changes to the native code of our app, we will need to modify some files in these two directories.
The most common reasons to find and modify files in these folders are:
Modify permissions (push notifications, access to location services, access to compass, and many more) by changing Info.plist (iOS) or AndroidManifest.xml (Android)
Change the build settings for any platform
Add API keys for native libraries
Add or modify native libraries to be used from our React Native code
node_modules/
This folder should be familiar to most of the JavaScript developers who worked with npm as it is where npm stores all the modules marked as a dependency in our project. It is not common to have the necessity to modify anything inside this folder, as everything should be handled through npm's CLI and our package.json file.
Files in the Root Folder
React Native's CLI creates a number of files in the root directory of our project; let's take a look at the most important ones:
.babelrc: Babel is the default library in React Native to compile our JavaScript files containing JSX and ES6 (for example, syntax into plain JavaScript capable to be understood by most of the JavaScript engines). Here, we can modify the configuration for this compiler so we can, for example, use the @ syntax for decorators as it was done in the first versions of React.
.buckconfig: Buck is the build system used by Facebook. This file is used to configure the building process when using Buck.
.watchmanconfig: Watchman is a service that watches the files in our project to trigger a rebuild anytime something changes in them. In this file, we can add some configuration options such as directories, which should be ignored.
app.json: This file is used by the react-native eject command to configure the native apps. It stores the name that identifies the app in each platform and also the name that will be displayed on the home screen of the device when the app is installed.
yarn.lock: The package.json file describes the intended versions desired by the original author, while yarn.lock describes the last-known-good configuration for a given application.
App.js: this is the main page of our app and entry point.
Build and run the app
React native apps can be executed in physical devices or virtual emulators,
For this example we will be using an android virtual emulator leveraging android studio AVD feature.
In this section we will review how to prepare our device, start a metro server and build our application to get it installed in our device.
Preparing our device
As a requirement, we would need an AVD configured in android studio before we can run our app.
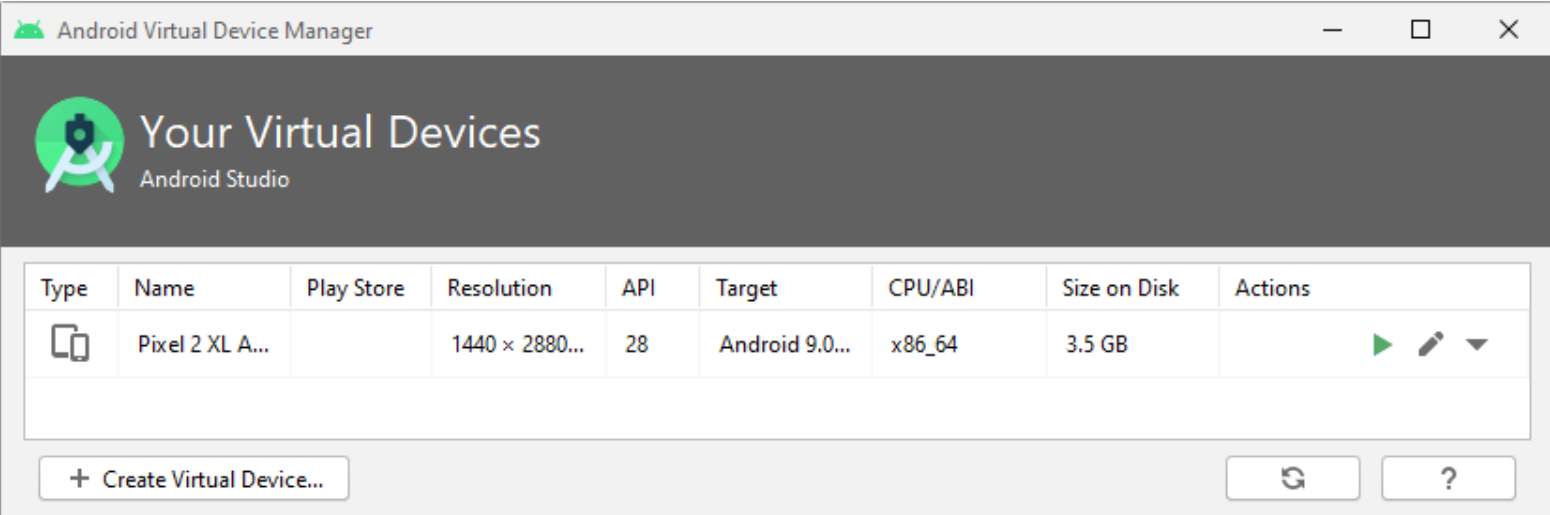
We can see the list of available Android Virtual Devices (AVDs) by opening the "AVD Manager" from within Android Studio.
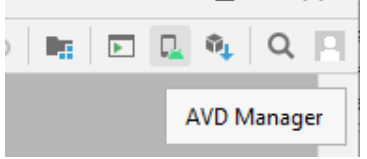
AVD Manager allow is to manage our AVD’s with options to create/delete, start AVD, swipe data and other config options
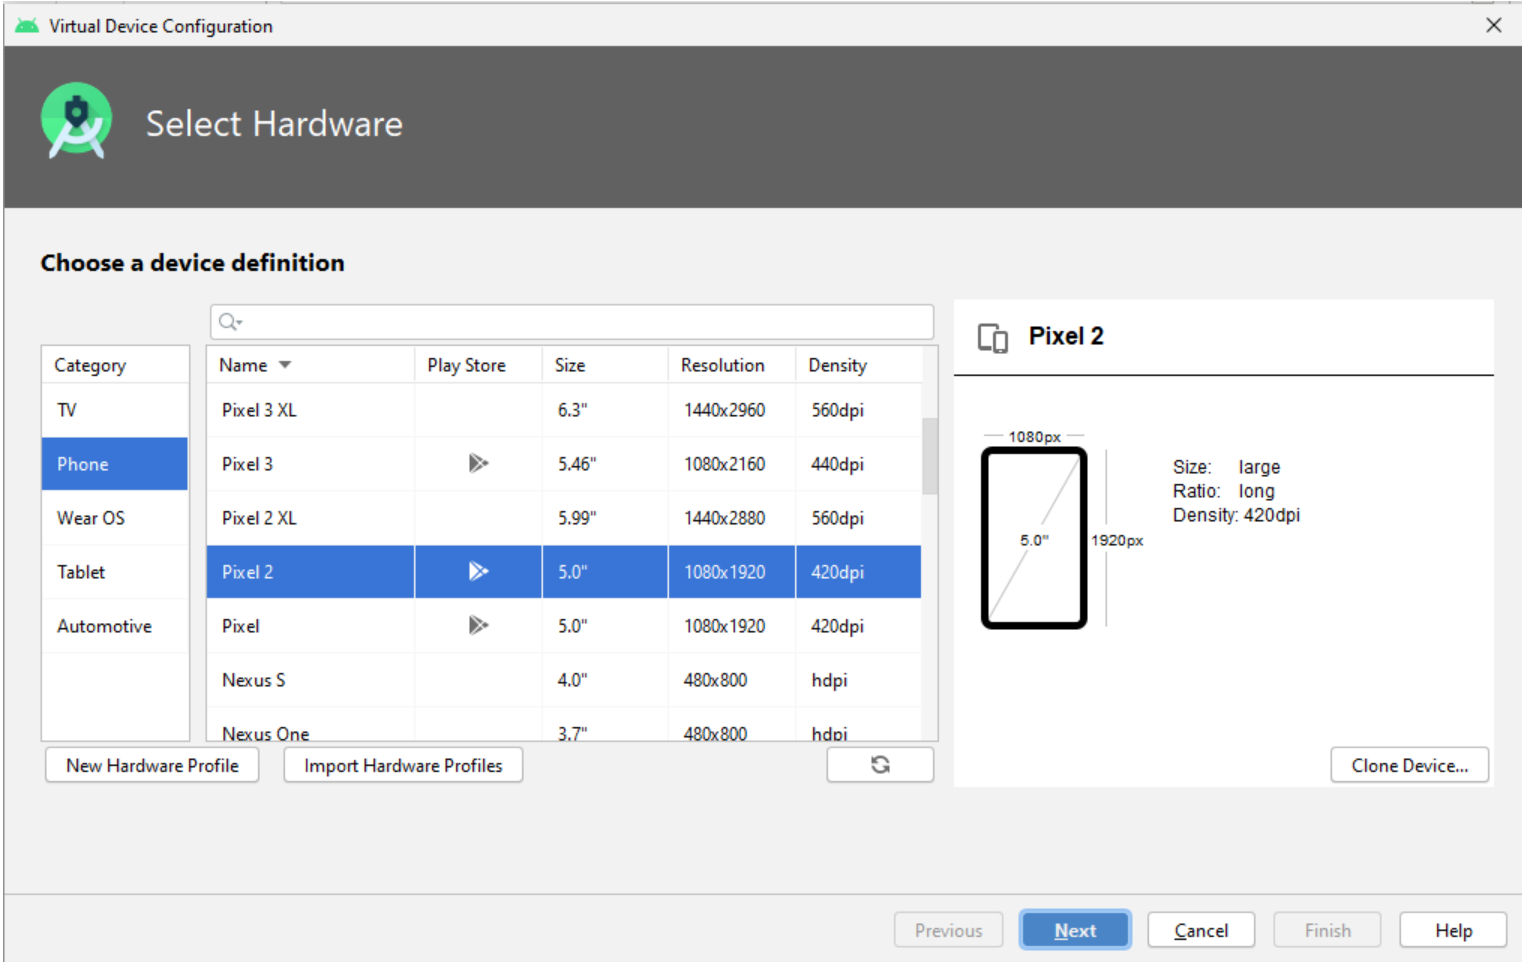
We can create new virtual devices by using the “Create Virtual Device” button in AVD Manager in 3 simple steps.
In the first step we will configure what kind of device we want to emulate selecting one of the available hardware profiles,
We could import new profiles if needed.
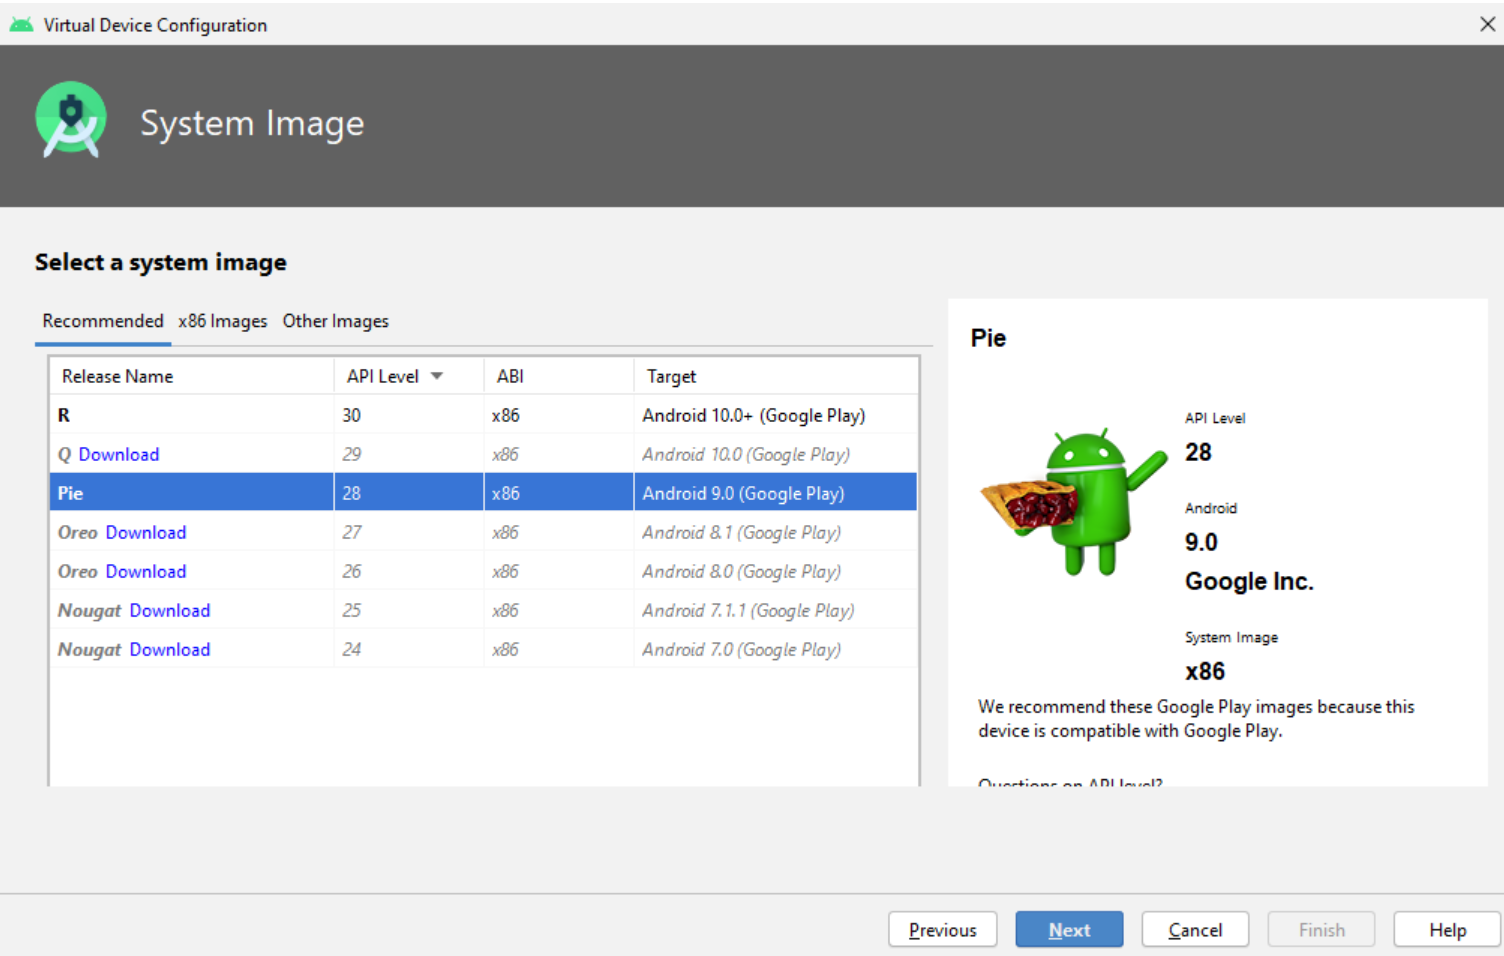
In the next step we will select what is the OS version we want to install in the device.
In the last step we can review the config and advanced settings for the device.
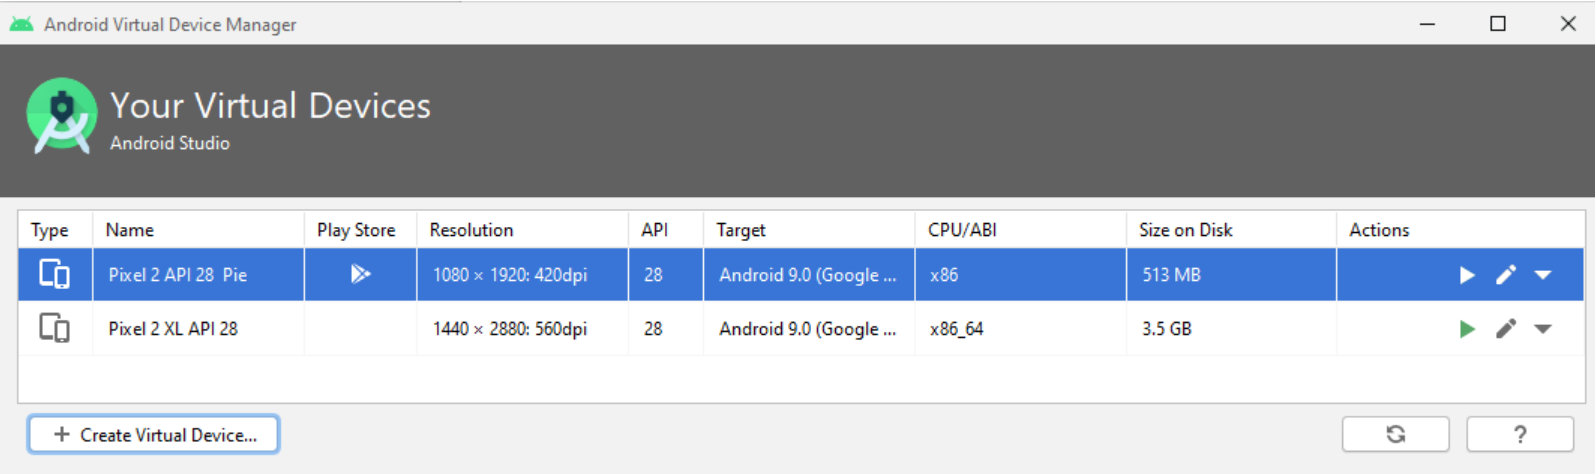
On pressing Finish the new AVD will be created for us
NOTE: we can create as many AVD as we want but in order to get the emulator automatically opened as part of the build process is recommended to have only one setup, if not build process does not know what emulator to open.
We could as well connect a physical device to our development machine using USB cable and enable USB debugging in developer tools in our android device to run our app, or use Expo CLI.
Starting Metro server
Once we have a device ready (Physical or virtual) we can proceed to the next step.
In order to run our app we need to start a Metro server.
Metro is a JavaScript bundler. It takes in an entry file and various options and gives back a single JavaScript file that includes all our code and its dependencies.
During the development process, React Native loads our JavaScript code dynamically at runtime. For this, we need a server to bundle our app code and provide it as needed.
Metro is the bundler used by apps created by the React-Native command line interface (CLI).
It is used to bundle our app code in development. This helps us with faster and easier debugging by enabling hot reloading etc.
Metro server is configured to start on port 8081 by default. Once the app is launched in the simulator, a request is sent to the server for the bundle.
The server then downloads all the required dependencies, bundles the JavaScript app code and sends it back to the app. After this step, you can see the app working on the simulator or a connected device.
To start the Metro server we will run react-native start in CMD inside our React Native project folder.
we will use npx to run our command.
npx react-native start
npx react-native start
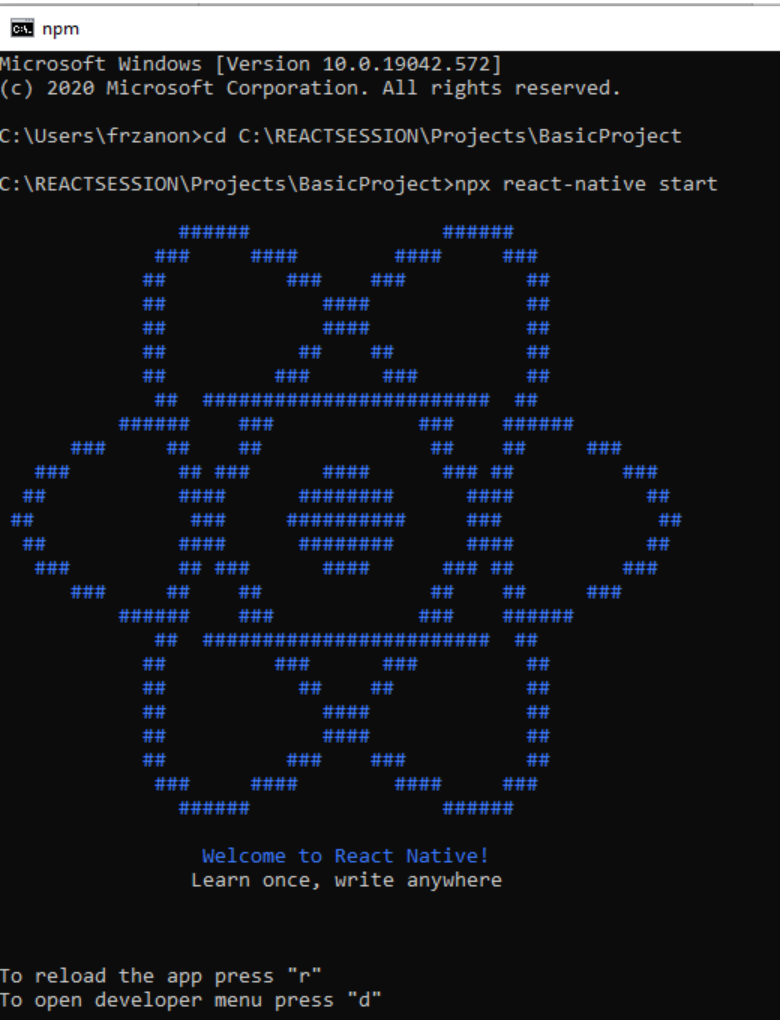
NOTE: leave this window open as if we close it will stop the Metro server and we need it to run the app
Building the app
The next step is build our app
Depending on the platform (Android/iOS) there are different commands that need to be used to build our app.
In our case we will use run-android
Open a new CMD and navigate to the project folder, then run
npx react-native run-android
npx react-native run-android
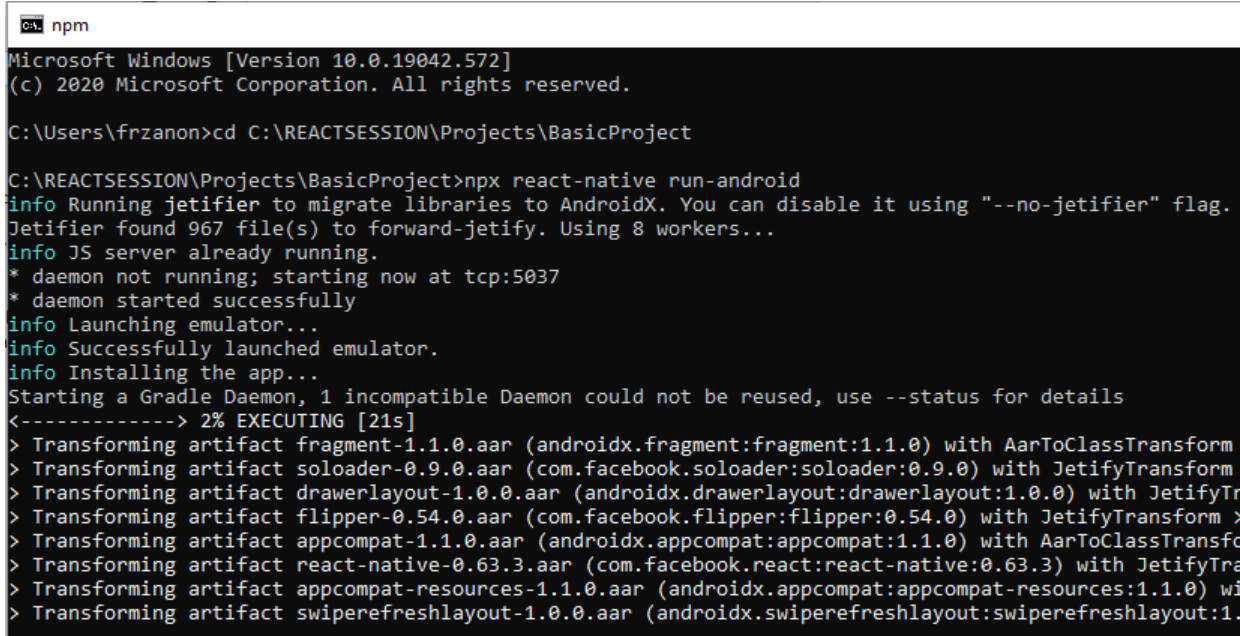
The process will:
Start our emulator deploy the app in the emulator Execute the app Once the process completes OK we should see the message Build successful and the app opened in our emulator
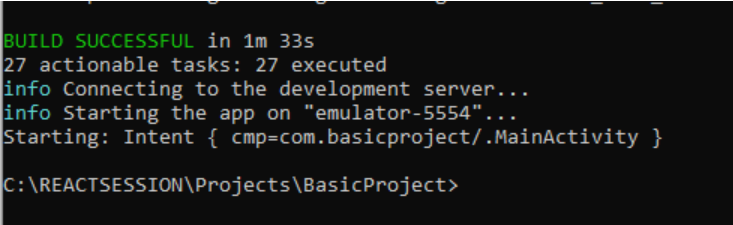
Build process can take a couple of minutes to complete.
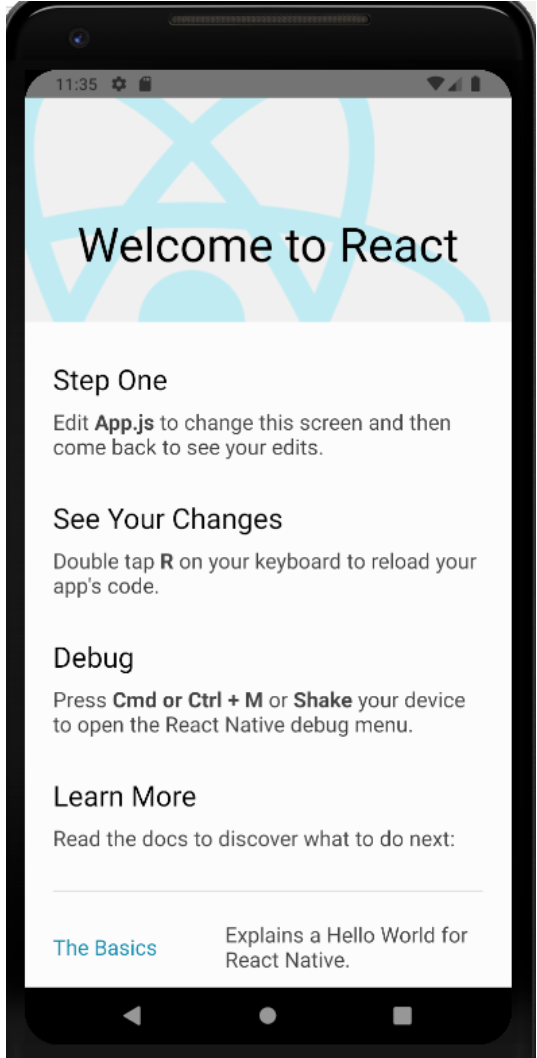
When we create a new project with React Native CLI using init command, the project will be created with a default project template that will look like the below on execution.
Let’s start to review how to modify our app.
Adding code to our app
In order to edit code for our react native project there are multiple IDE’s available we can use but we will work with Visual Studio Code.
Check installation guide for more details about installing Visual Studio Code and related tools.
Open Visual Studio Code and select the option open folder in the File menu.
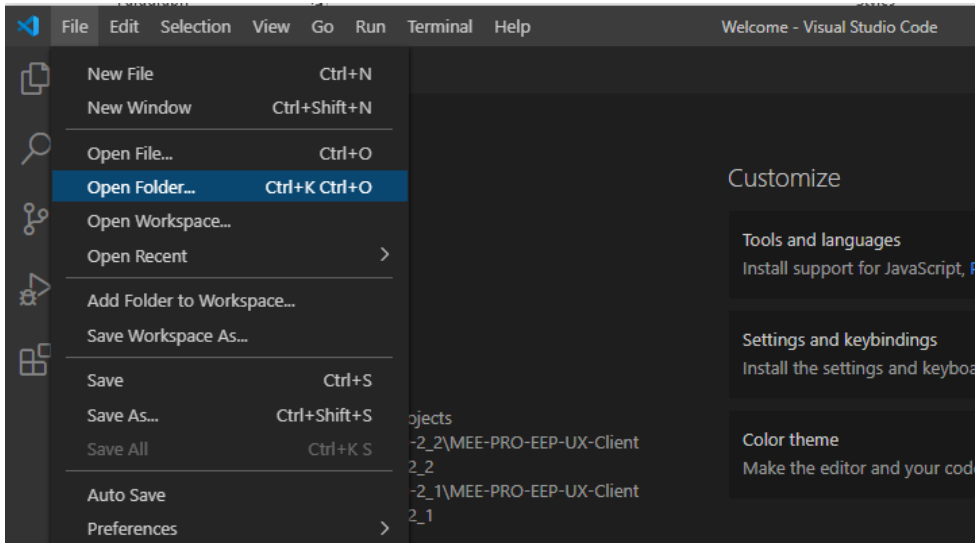
Select our project folder.
This will load the project files in VS code
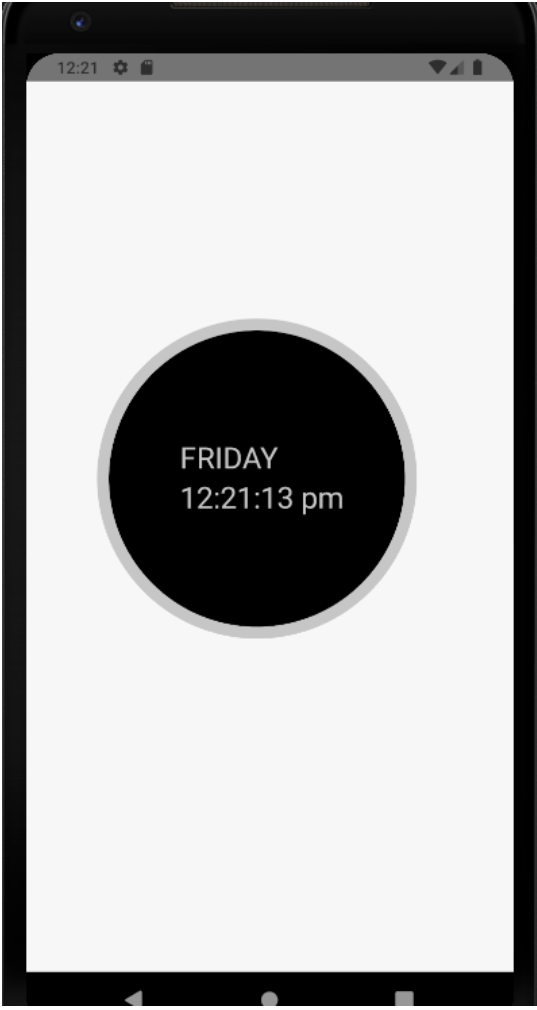
For our basic application we will be implementing a digital watch app that will display the current day of the week and the time on the screen like the below image.
Dynamically updating the values to reflect always current day and time
Copy the code below and replace the content of App.js
import React, {Component} from 'react';
import {View, Text, StyleSheet} from 'react-native';
export default class App extends Component {
  constructor() {
    super();
    this.state = {currentTime: null, currentDay: null};
    this.daysArray = [
      'sunday',
      'monday',
      'tuesday',
      'wednesday',
      'thursday',
      'friday',
      'saturday',
      'sunday',
    ];
  }
  // helper method to get current day and time
  getCurrentTime = () => {
    let hour = new Date().getHours();
    let minutes = new Date().getMinutes();
    let seconds = new Date().getSeconds();
    let am_pm = 'pm';
    if (minutes < 10) {
      minutes = '0' + minutes;
    }
    if (seconds < 10) {
      seconds = '0' + seconds;
    }
    if (hour > 12) {
      hour = hour - 12;
    }
    if (hour === 0) {
      hour = 12;
    }
    if (new Date().getHours() < 12) {
      am_pm = 'am';
    }
    this.setState({
      currentTime: hour + ':' + minutes + ':' + seconds + ' ' + am_pm,
    });
    this.daysArray.map((item, key) => {
      if (key === new Date().getDay()) {
        this.setState({currentDay: item.toUpperCase()});
      }
    });
  };
  // called before component destroyed
  componentWillUnmount() {
    clearInterval(this.timer);
  }
  // called inmediately after component mounted
  componentDidMount() {
    this.timer = setInterval(() => {
      this.getCurrentTime();
    }, 1000);
  }
  // renders the content for the app
  render() {
    return (
      //<View style={styles.container}>
      <View style={styles.containerCircle}>
        <View style={styles.CircleShapeView}>
          <Text style={styles.daysText}>{this.state.currentDay}</Text>
          <Text style={styles.timeText}>{this.state.currentTime}</Text>
        </View>
      </View>
      //</View>
    );
  }
}
// CSS styles used
const styles = StyleSheet.create({
  container: {
    flex: 1,
    // paddingTop: (Platform.OS === 'ios') ? 20 : 0,
    justifyContent: 'center',
    alignItems: 'center',
  },
  headerText: {
    fontSize: 30,
    textAlign: 'center',
    margin: 10,
    color: 'black',
    fontWeight: 'bold',
  },
  timeText: {
    top: 90,
    left: 60,
    fontSize: 25,
    color: '#C8C8C8',
  },
  daysText: {
    top: 90,
    left: 60,
    color: '#C8C8C8',
    fontSize: 25,
    paddingBottom: 0,
  },
  containerCircle: {
    top: 200,
    left: 60,
    flex: 1,
  },
  CircleShapeView: {
    width: 270,
    height: 270,
    borderRadius: 580 / 2,
    borderWidth: 10,
    borderColor: '#C8C8C8',
    backgroundColor: '#000000',
  },
});
Get the full project from the link below:
Let's remove the default template code from App.js and start to add our own code here.
We will implement this example with traditional Class component
Imports section:
In this section we will import any of the components and libraries that we will be using.
Our page will use a set of components from react & react-native libraries.
Including react Component and react-native UI components View & Text.
import React, {Component} from 'react';
import {View, Text, StyleSheet} from 'react-native';
We need to import always any component we want to use as the first section in our pages.
Component:
This section defines our class component and exports it so it can be referenced later on in index.js
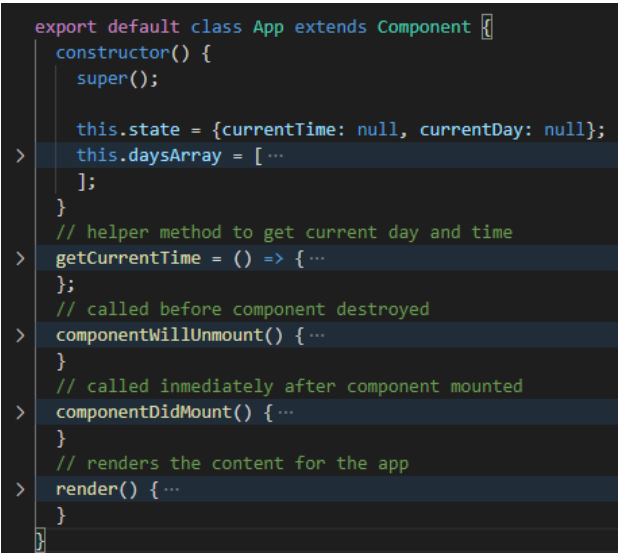
We will first define a constructor where we will set the initial state for the page and define any required variable,
constructor() {
super();
this.state = {currentTime: null, currentDay: null};
this.daysArray = [
'sunday',
'monday',
'tuesday',
'wednesday',
'thursday',
'friday',
'saturday',
'sunday',
];
}
Then we will have a set of methods that can be lifecycle methods or instrumental methods required to implement our functionality
Lifecycle methods in React Native is a set of methods provided by React Native to instantiate, mount, render, and finally update, unmount, and destroy components. Lifecycle methods are functions which are placed in our class and will be automatically called at some point. One of those methods is componentDimMount()
In our example we are using 3 of these methods,
componentDidMount is called once after the whole UI for this component has finished rendering only on the client side. This is where ajax requests and DOM or state updates should occur. This can be used inside the component just like we used componentWillMount inside the component.
We use this method to set a timer interval to run our getCurrentTime method every second so our watch will be updated every second with the time change.
// called inmediately after component mounted
  componentDidMount() {
    this.timer = setInterval(() => {
      this.getCurrentTime();
    }, 1000);
  }
componentWillUnmount method is called when a component is being removed.
We use this method to stop our timer.
// called before component destroyed
  componentWillUnmount() {
    clearInterval(this.timer);
  }
render is the most used method for any React powered, it has to return something whether it is null. When the component file is called it calls the render method by default because that component needs to display the HTML JSX.
Here is where we add our UI components that will be displayed in our screen.
// renders the content for the app
  render() {
    return (
      //<View style={styles.container}>
      <View style={styles.containerCircle}>
        <View style={styles.CircleShapeView}>
          <Text style={styles.daysText}>{this.state.currentDay}</Text>
          <Text style={styles.timeText}>{this.state.currentTime}</Text>
        </View>
      </View>
      //</View>
    );
  }
Then we define a custom method to retrieve day of the week and time in the desired format called getCurrentTime.
// helper method to get current day and time
getCurrentTime = () => {
let hour = new Date().getHours();
let minutes = new Date().getMinutes();
let seconds = new Date().getSeconds();
let am_pm = 'pm';
if (minutes < 10) {
minutes = '0' + minutes;
}
if (seconds < 10) {
seconds = '0' + seconds;
}
if (hour > 12) {
hour = hour - 12;
}
if (hour === 0) {
hour = 12;
}
if (new Date().getHours() < 12) {
am_pm = 'am';
}
this.setState({
currentTime: hour + ':' + minutes + ':' + seconds + ' ' + am_pm,
});
this.daysArray.map((item, key) => {
if (key === new Date().getDay()) {
this.setState({currentDay: item.toUpperCase()});
}
});
};
The last section in our example is the set of CSS styles that we will apply to the UI components in render.
// CSS styles used
const styles = StyleSheet.create({
  container: {
    flex: 1,
    // paddingTop: (Platform.OS === 'ios') ? 20 : 0,
    justifyContent: 'center',
    alignItems: 'center',
  },
  headerText: {
    fontSize: 30,
    textAlign: 'center',
    margin: 10,
    color: 'black',
    fontWeight: 'bold',
  },
  timeText: {
    top: 90,
    left: 60,
    fontSize: 25,
    color: '#C8C8C8',
  },
  daysText: {
    top: 90,
    left: 60,
    color: '#C8C8C8',
    fontSize: 25,
    paddingBottom: 0,
  },
  containerCircle: {
    top: 200,
    left: 60,
    flex: 1,
  },
  CircleShapeView: {
    width: 270,
    height: 270,
    borderRadius: 580 / 2,
    borderWidth: 10,
    borderColor: '#C8C8C8',
    backgroundColor: '#000000',
  },
});


