Augmented reality with React native & ViroReact
React native & ViroReact
VR and AR are very promising technologies that can improve how we experience things.
From providing immersive experiences in entertainment and gaming, to performing healthcare simulations in a virtual environment.
Nowadays most of us carry everywhere a mobile device with internet access.
it is interesting to enable this VR/AR experiences on the mobile devices as we enable the vast majority of people to enjoy this experiences by using the devices they already have.
ViroReact
ViroReact is an open source developer platform for rapidly building AR/VR applications using React Native.
ViroReact has two main components:
React components for VR and AR development - ViroReact comes with a number of custom React components that allow you to render different scenes, objects, and controls in a 3D environment.
High-performance native 3D rendering engine - ViroReact renders all objects with native device hardware acceleration. This means that the performance is actually good even though we’re using React Native.
For more information visit:
Pre-requisites
Basic knowledge of React Native is required. Your machine should also be set up for plain React Native development (not Expo).
See below about how to setup your development environment
Make sure you select Native CLI and windows development environment and android target platform.
(we do not require android studio)
ViroReact uses ARCore and ARKit behind the scenes.
ARCore is the AR development platform for Android, while ARKit is the iOS equivalent.
Both use the device’s accelerometer and gyroscope to perform the environment mapping as the device is moved.
This allows for a truly immersive experience as if the user is navigating the real world.
Do note that ARCore and ARKit have limited support for devices:
The app that we will be creating will use AR to load a 3D model in a designated plane by using an anchor and allow us to change some of the properties.
see video here:
Creating the app
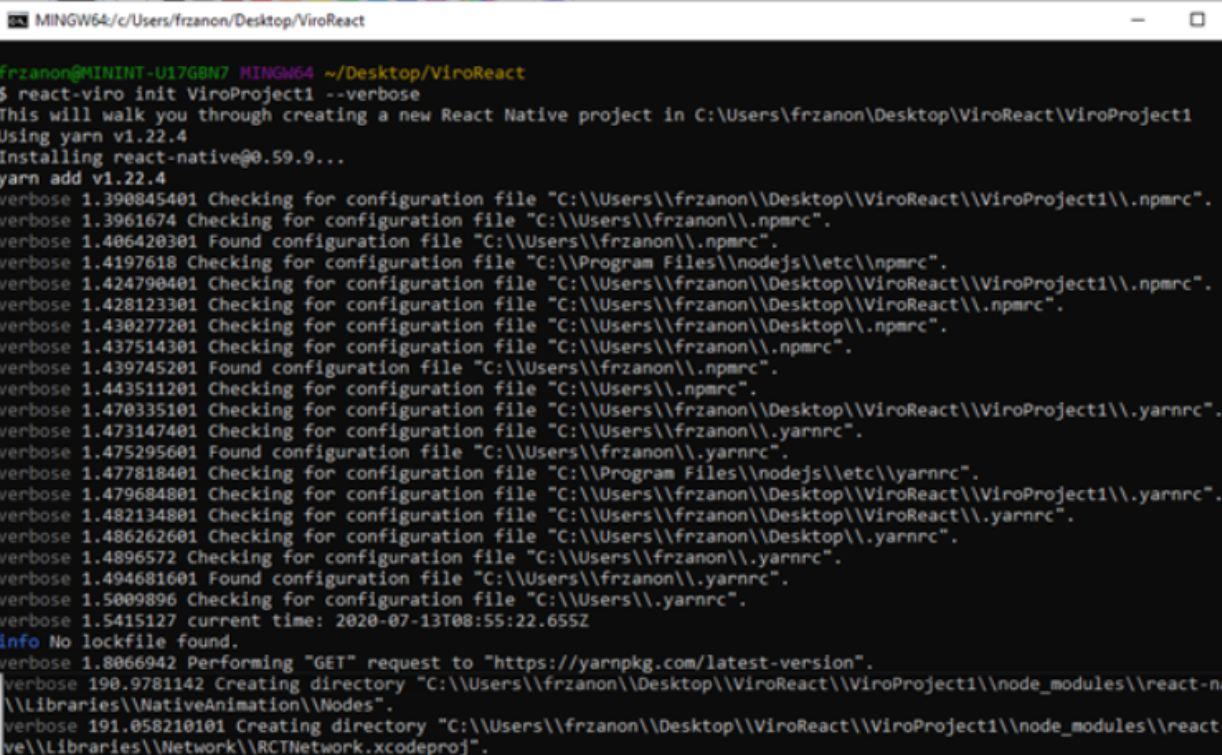
The first thing that we need to do is install the Viro CLI tool. This will allow us to easily generate a React Native project which has all the dependencies required for running VR/AR apps:
We will use npm install to get the react-viro-cli
npm install -g react-viro-cli
Next we will create a new project:
Use a bash tool to run this commands (I used git Bash)
Navigate to the folder where we want to create the project and run init command
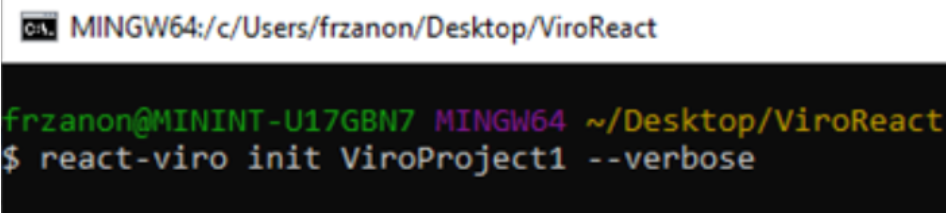
This will start creating our project, can take several minutes
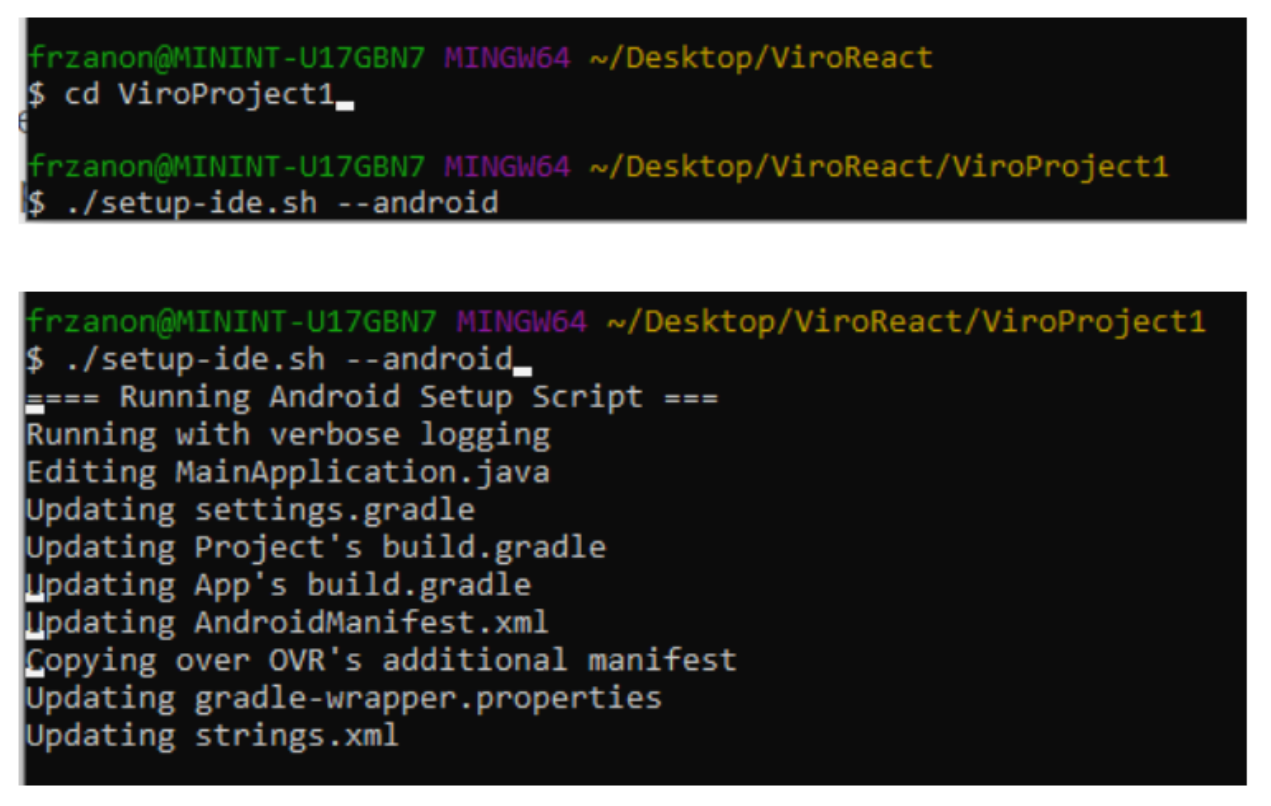
Once the project is created, navigate inside the project directory and run ./setup-ide.sh:
The option can either be --ios, --android, or --all.
In our case we will use –android.
Once that’s done, we can actually run the app.
The Viro CLI tool already includes a sample app when we bootstrap a new project.
we can run the app via the Viro Media app that we can download in our device or via run-android command of react-native CLI.
In our case we will use the second option so we will get the app deployed in our android device so we can test it.
We will run this command inside the project directory
this will build the app and install it in our device,
make sure the device is connected to our PC via USB, (in the device enable developer options and USB debugging is enabled)
This should open a metro server for us as well,
If not we can do this by using the command below inside the same project directory

Checking the standard project template
ViroReact is built on top of React Native and uses React Native constructs to make it easy to create native AR applications. In addition to understanding Javascript, you will also need to understand some basic React concepts, like JSX, components, state, and props.
The code begins by importing React, StyleSheet from React Native and react-viro components that the app will use.
There loads of things that can be rendered in, and that can all be found in their documentation.
Below the import code, we create a standard ES6 class HelloWorldSceneAR that extends a React Component that adheres to the react component lifecycle. Read more about ES6 classes here
https://developer.mozilla.org/en-US/docs/Web/JavaScript/Reference/Classes
https://hacks.mozilla.org/2015/07/es6-in-depth-classes/
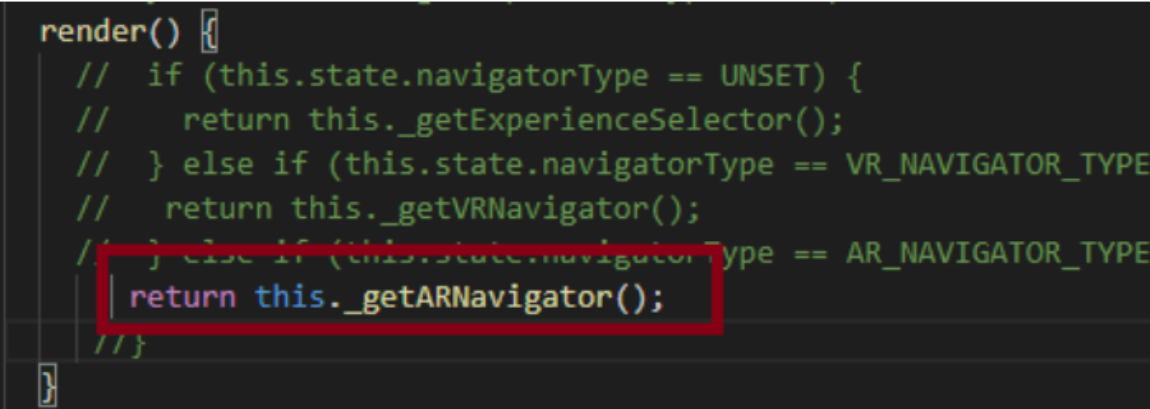
The standard project template provides two experiences, one for VR and one for AR.
in the App.js we have 2 imported components from react-viro that we will use as entry points
ViroVRSceneNavigator: ViroVRSceneNavigator is the entry point for VR applications
ViroARSceneNavigator: is the entry point for AR applications with Viro.

The viro-react components and resources that define scenes are placed in a js folder in the project folder
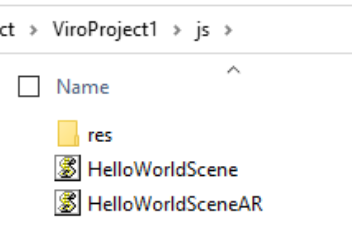
The res folder will contain models, images and textures that we will use in our scenes
In the app.js we will return an entry point to one of the defined scenes
Lets check the HelloWorldSceneAR flie
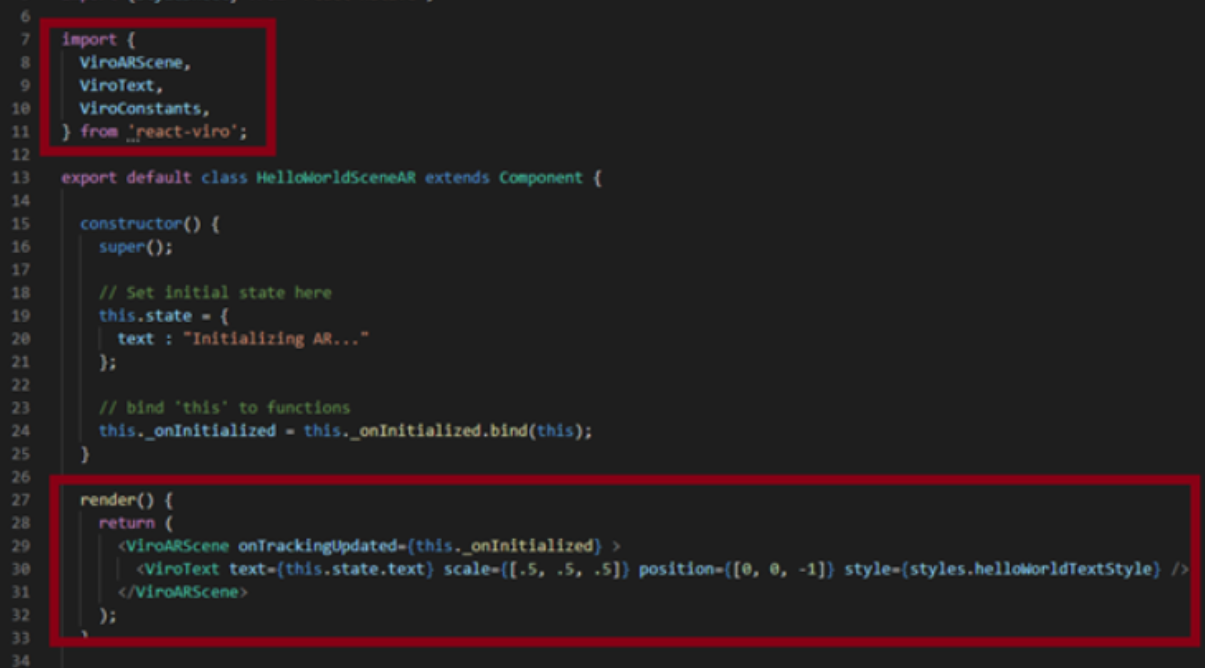
First we start with the constructor(). In the constructor, we call the super()/parent constructor (in Component) and we initialize the state. Below that, we "bind" this to the functions we declare in this class so that they may reference this object.
Next, we have the render() function which determines how our scene is displayed. It's defined using JSX which is syntactically similar to HTML. In the section below we go through this method in detail.
In the return statement, we declare the top level component: ViroARScene. Every AR scene must have a ViroARScene as its top-most element. All other components are children of ViroARScene. We use the callback prop, onTrackingUpdated, to call our _onInitialized() function below which sets the text to "Hello World!" once the tracking status is TRACKING_NORMAL.
ViroText is declared next. It switches between "Initializing AR..." and "Hello World" depending on the state at a position of [0,0,-1] with the font, font size and color specified by the style property. In our coordinate system, the viewer faces in the negative-Z direction, so providing a Z coordinate of -1 places the object in front of the viewer.
Modifying the template project
In our case we are only interested in the AR at this moment so the first thing we will do is provide direct access to it from app.js
To do this, we will comment or delete the code to provide the options and directly open the AR scene.
Now let’s start to add to the HelloWorldSceneAR scene
First let's add all the required components in import statement
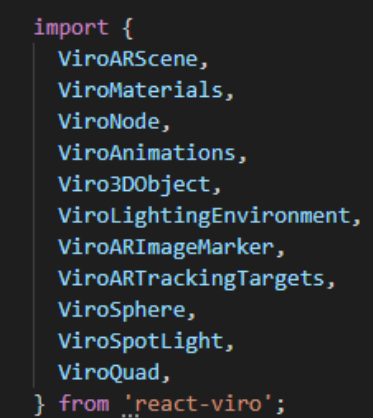
The idea is to use ViroImageMarker and ViroTrackingTargets to position a 3D model in a plane
We will use image recognition capabilities in viro-react to identify our image and use it as anchor to position our 3d model.
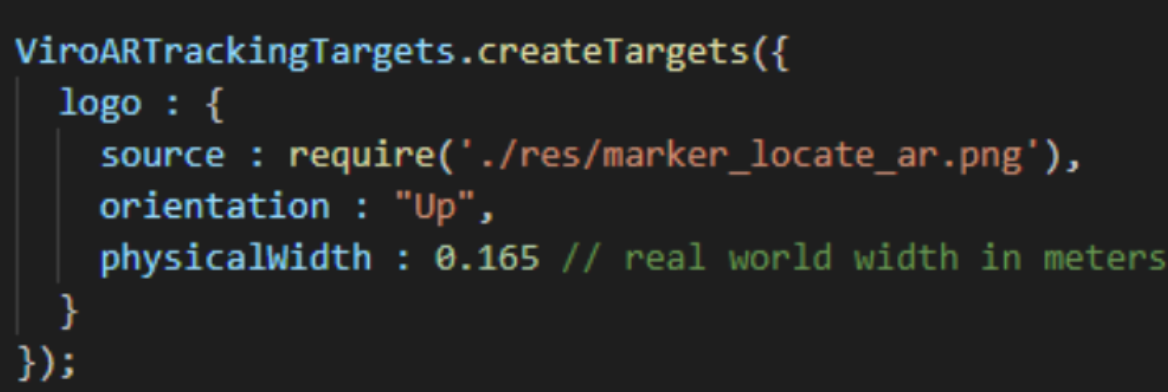
as our image marker we can use any image that is recognizable, in my case I created an image in paint and saved it in the resources folder
We will use it to create a target with ViroTrackingTargets named logo
We will add ViroARImageMarker component inside our ViroARScene that will contain the rest of components.
As target we will select the target defined with ViroTrackingTargets
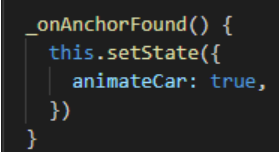
ViroARImageMarker onArchorFound method will be used to scale out our 3d Model so it will be visible.
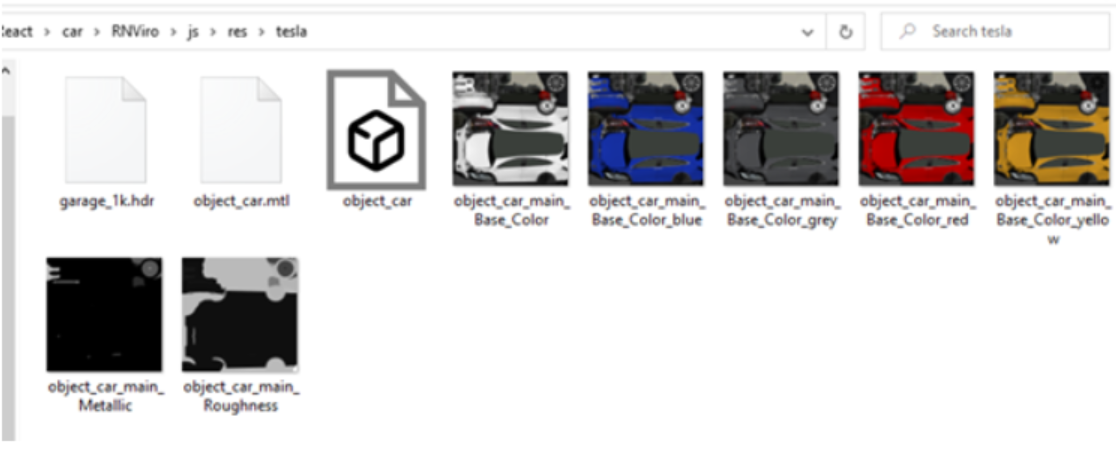
We will use Viro3DObject component to load our model
in our example we use an OBJ 3d object
in order to display this we need the .obj file, the .mtl (materials file) and we would need the textures associated.

The textures for our model need to be defined as well before we can use them as materials for an object

Textures need to be stored in the res folder along the .obj and .mtl files
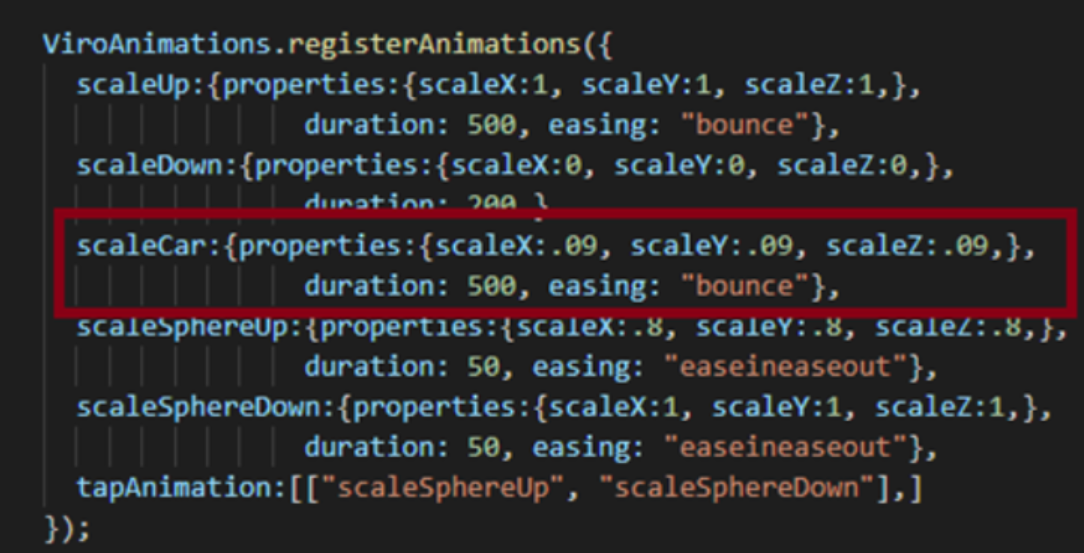
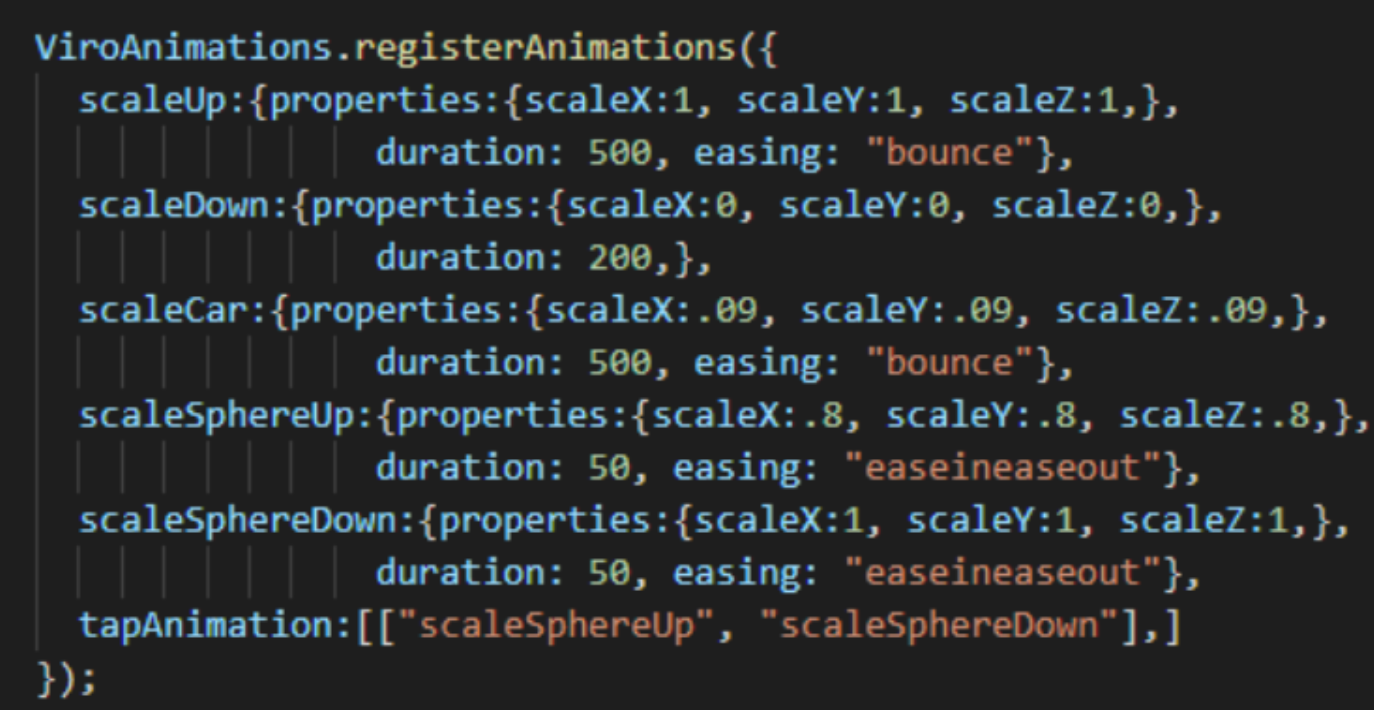
As we can see we apply an animation to the object based on a state variable.
Animations need to be registered before we can use them, see more about animations here:
in our case we will scale our 3D object as part of this animation
The state variable that controls this will be initialized to false in the constructor
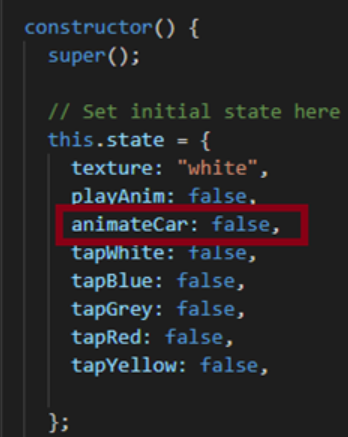
And changed when we find the image used as anchor marker in the anchorFound method.
This will make the 3d model to scale in the plane defined
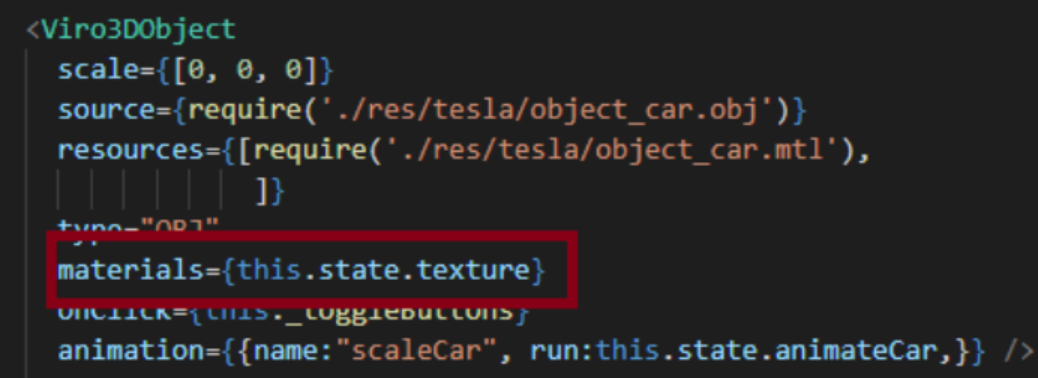
In this example we want to change the materials for the 3D object.
To achieve this, first we need to display somehow the options in the UI to allow the user to select among them,
For this we will use a set of ViroSphere components inside a ViroNode component
each sphere will be used to apply a different material to the model.
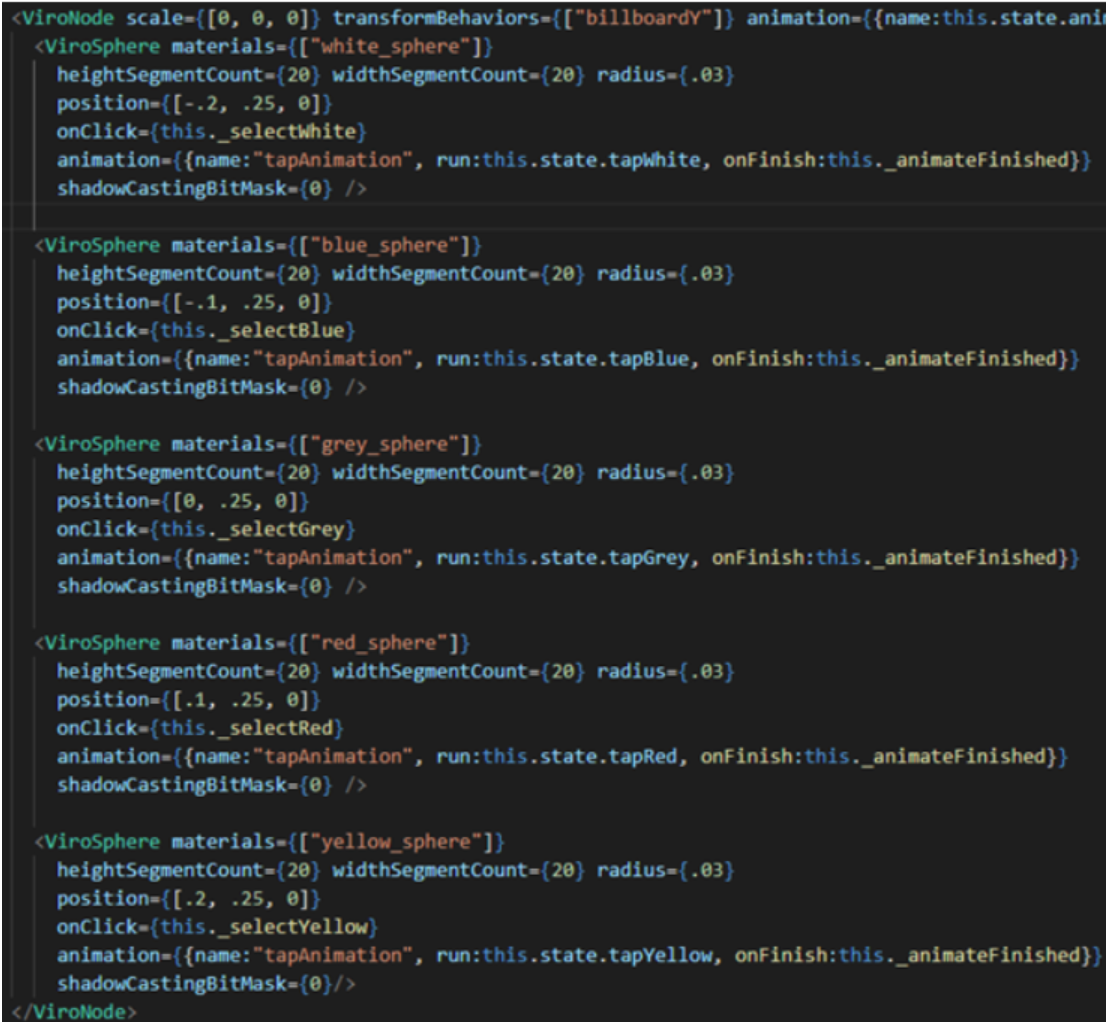
When we click on the model in the screen we will use variables in the state to display the ViroNode that contains the spheres
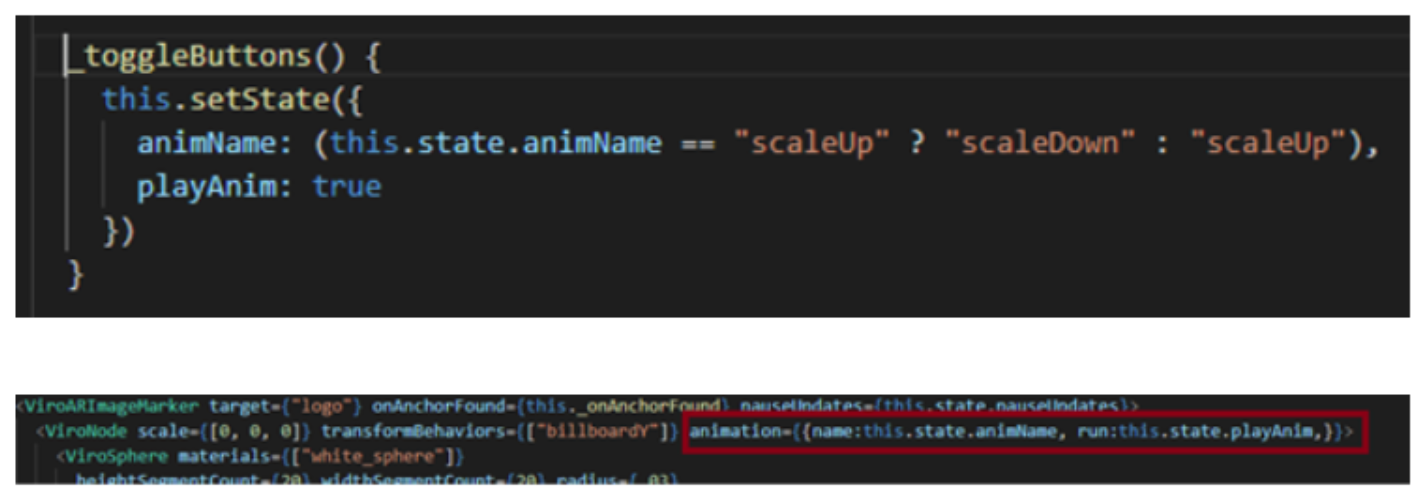
The animations as said before need to be registered before use them
Finally lets talk about the spheres inside the ViroNode,
Tapping in each sphere will change the material of the 3d object
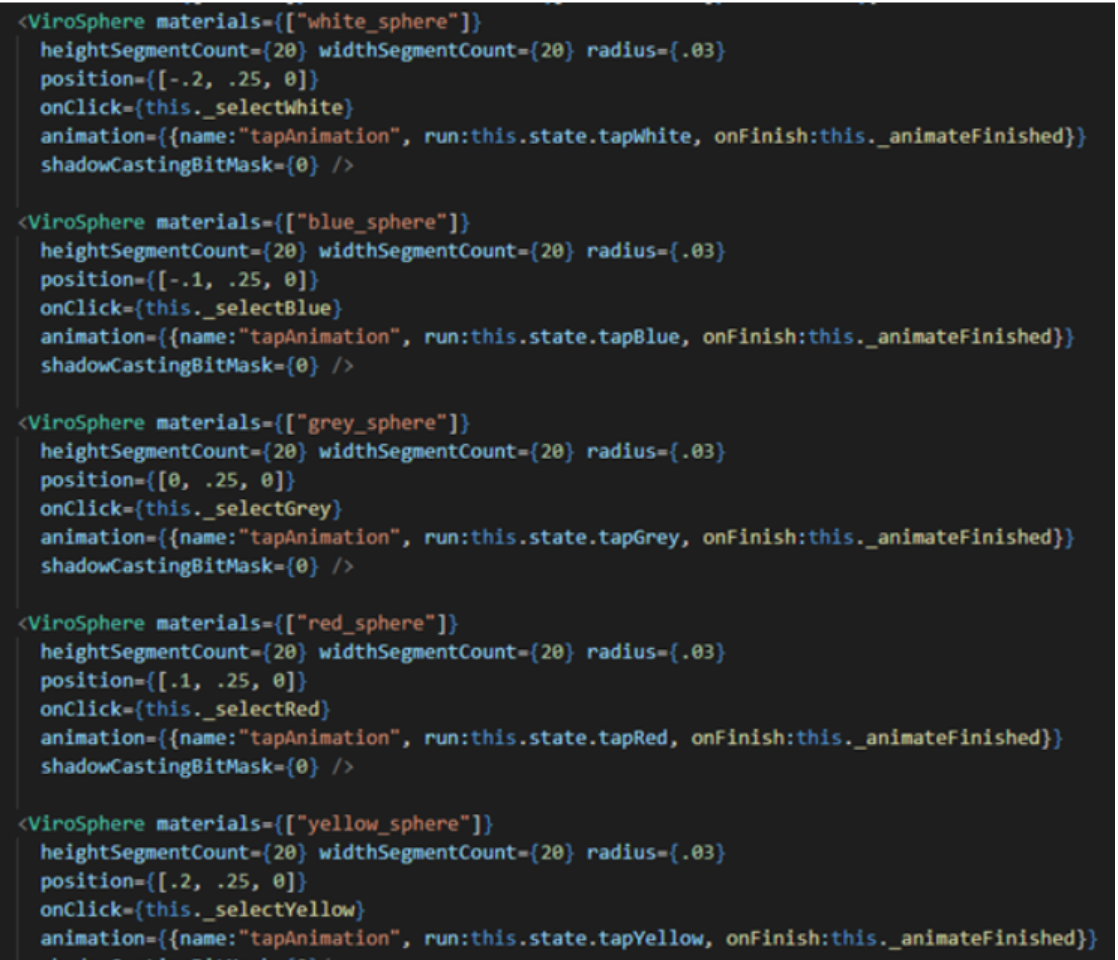
Each sphere will have a material assigned that will define it’s colour, as before this materials need to be defined
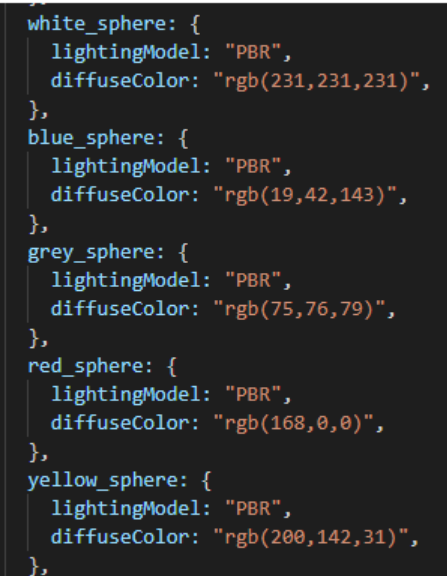
When we tap on each sphere, we will set the texture material for the 3d object with a different material of the ones we defined.
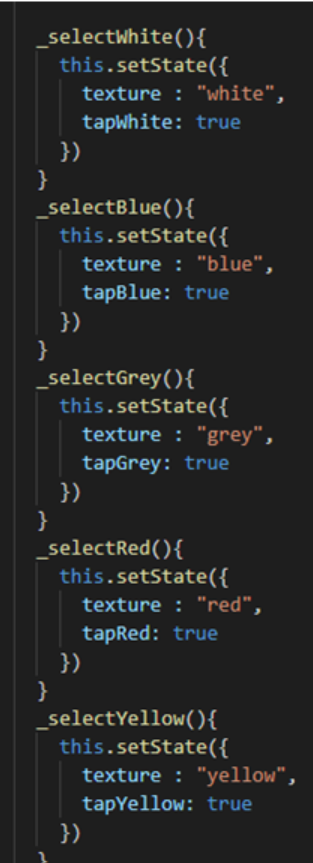
As we can see we are modifying the state variables in each method setting the texture.
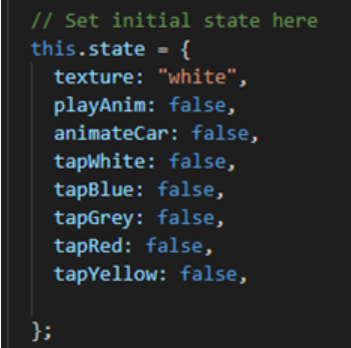
This texture state var is dynamically used in our object.
Get code sample here:
See other example of AR app here:


